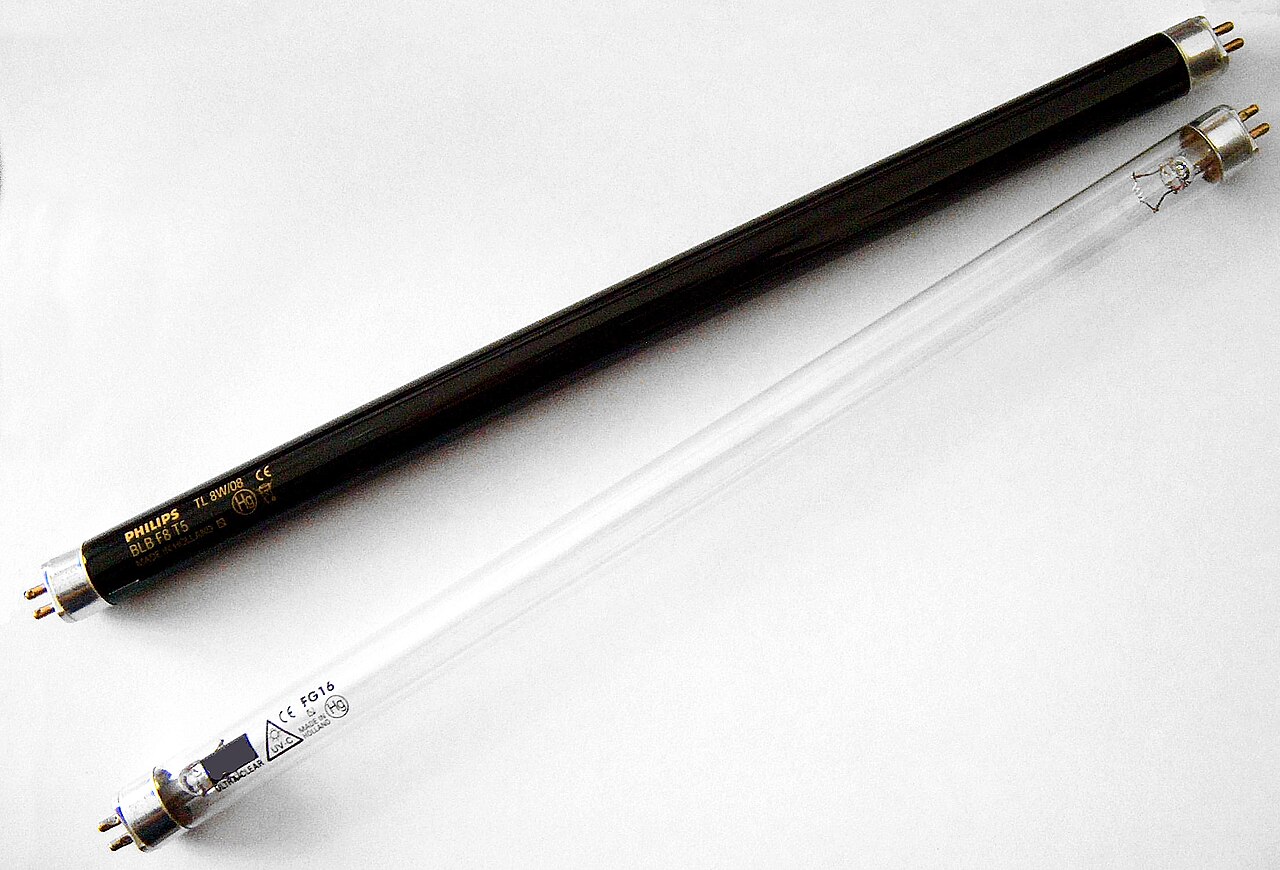
 The afternoon thunderstorm rolled off Biscayne Bay just as the AC kicked on for the third time that hour. Inside a Coral Gables condo, the air handler hummed behind a louvered closet door, and the blue glow from the UV-C bulb — the one mounted just downstream of the coil — had gone dark two weeks ago. The homeowner noticed a faint musty smell when the blower started, the kind that comes from wet coil fins sitting in South Florida humidity without that ultraviolet scrub. She texted a photo of the dark tube. "Is this something I can do myself?" she asked. The answer is yes, if you follow the safety steps and don't rush the power-down.
What is a UV-C bulb and why does it matter?
UV-C stands for ultraviolet-C, a short-wavelength ultraviolet light between 200 and 280 nanometers. At 254 nanometers — the sweet spot for most HVAC lamps — the light breaks the DNA of bacteria, viruses, and mold spores that pass through the air stream. The bulb sits inside the duct or air handler, usually just after the evaporator coil where moisture collects. Think of it like a security checkpoint: air moves past, and anything alive gets zapped before it reaches your vents. In Miami-Dade, where the AC runs 10 months a year and indoor humidity often sits above 60 percent, that checkpoint keeps the coil cleaner and the air smelling fresher.
The bulb itself looks like a skinny fluorescent tube — typically a T5 diameter (5/8 inch) with two pins at each end. It plugs into an electronic ballast mounted on the air handler cabinet. The ballast converts household voltage to the high-frequency, high-voltage signal the lamp needs to strike and stay lit. When the bulb ages, the mercury inside depletes and the arc becomes unstable. You might see flickering, a dimmer blue glow, or no light at all through the sight glass.
How do I know when my UV-C bulb needs replacing?
Most manufacturers rate UV-C lamps for 9,000 hours of continuous operation. That's roughly 375 days — just over a year if your system runs 24/7, which many South Florida systems do from April through November. After 9,000 hours, the UV-C output typically drops to 80 percent of its original intensity. At that point, it's still glowing blue but not killing microbes effectively. Some newer LED-based UV-C modules last longer, but the fluorescent tubes in most existing installs follow the 9,000-hour rule.
Signs it's time: the sight glass on the access panel shows no light or a weak purple glow; the musty "dirty sock" smell returns when the blower starts; you see visible biofilm on the coil fins during a filter change; or the bulb has physically cracked or blackened at the ends. Mark the install date on the ballast housing with a silver Sharpie. That way you're not guessing.
What tools and parts do I need?
Gather these before you start: a replacement UV-C lamp matching your system's length (usually 12-inch or 16-inch), wattage (18W, 24W, or 36W), and pin configuration (most are two-pin or four-pin T5). Check the label on the old bulb or the ballast for the exact model. You'll need a Phillips screwdriver for the access panel screws, nitrile gloves to avoid skin oils on the new lamp glass, and a non-contact voltage tester to confirm power is dead. A small flashlight helps inside the dark cabinet. That's it — no special HVAC tools required.
If your bulb uses a four-pin base, note the keying notch orientation before pulling it. Some ballasts are keyed so the lamp only goes in one way. Take a phone photo of the wiring and bulb position before disconnecting anything. It saves guesswork on reassembly.
How do I safely replace the UV-C bulb?
Safety first: UV-C light damages eyes and skin in seconds. Never look at a lit bulb. Never power the system with the access panel off. Start by turning off the thermostat. Then kill power at the air handler's disconnect switch — usually a pull-out handle or breaker on the side of the unit. For belt-and-suspenders safety, also flip the HVAC breaker in your main panel. Use your voltage tester on the ballast wires to confirm zero volts.
Remove the access panel screws and set them aside in a magnetic tray or your pocket. The bulb sits in spring-loaded sockets or twist-lock holders. Gently rock the old lamp straight out — don't force it. If it's a four-pin base, depress the release tab while pulling. Place the old bulb in its box for recycling; fluorescent lamps contain mercury and shouldn't go in household trash. Miami-Dade accepts them at home chemical collection centers.
Put on nitrile gloves. Remove the new lamp from its sleeve holding only the ceramic ends. Align the pins with the sockets — match the keying notch if present — and press firmly until seated. You'll feel a click or the spring tension engage. Double-check that the lamp sits straight and centered. Reinstall the access panel, snug the screws (don't overtighten — the gasket seals the duct), and restore power at the breaker and disconnect. Set the thermostat to cool. Watch the sight glass: the bulb should strike within 5–10 seconds with a steady blue glow.
Here's a walkthrough that shows the whole process on a typical residential air handler:
The video is a start-to-finish tutorial on replacing a UV bulb in a home AC unit, and it matches the steps above almost one for one. It starts with the part people skip: killing power to the UV box before touching anything. Then the cover screws come off to expose the lamp -- the host notes your UV box might look a little different from his, but the process is the same because the device is simple: a wire connector and the bulb itself. He presses the locking tab to separate the connector, then removes the two thumbscrews holding the element in place -- they are only finger tight. The old bulb pulls straight back out, and you can see the burnt filament inside, just like a spent regular light bulb. For the new bulb, the golden rule is hands off the glass: skin oils shorten lamp life, so handle it by the ends and line up the notches with the mounting screws. The key takeaway the video drives home: no blue glow through the viewport means the lamp is done, even if it still looks intact. Watch the connector step twice -- that locking tab has to click fully back together before you restore power.
When to call us
DIY is great, but some jobs need a pro. If the problem persists, you spot anything dangerous, or you'd rather have an expert handle it, call (786) 949-9255 — South Florida AC Sanitation serves Miami-Dade County (Mon-Sat 8AM-8PM). No pressure, no upsells.
← Back to Blog